Wednesday, May 15, 2013

Where Have You Been?

Long time not post. Seriously long time. I have been busy with my two boys, ages 4 and 6 (almost 7 he says). We have been playing, doing homework, reading, and visiting local parks and musuems. I have been working with my toddlers in my parent-child classes. I have been learning to sleep all night after four long years of interuppted sleep.

I have not been inspired to write and post, although I have tons of pictures of all the fun arts/crafts we have been doing. I have over 200 photos in my camera roll ready for me to clean up and post. I just do not have the energy to do it. I blame part of it on our long winter. I also blame it on the main distractions in my life; Facebook, Pinterest, and the Internet in general.

I now have the attention span of a gnat. Thank you Internet.

Today I tried playing in the sandbox with my 4 year old and I could not stop looking at my iPhone. Yes, I was emailing back and forth with my son's principal, but that is just an excuse. I could not sit down and give my son five minutes of undivided attention. It broke my heart when I realized it. My oldest was pre-smart phone. No Facebook, no Pinterest. I sat for a good 45 minutes and would pretend I was Dora. My youngest doesn't even get five. Sigh. I give my toddlers in class more attention than my own son!

I have been reading fellow bloggers who feel the same way; the Internet is getting in the way of being the parent you want to be. This brings me to my point.

I will be doing this instead of blogging this summer:


Taking time out to watch the little things. 


And this:

Not the best picture, but this is our new (used) camper! We already have 5 trips planned.


So you will not see a whole lot of me, but I hope to come back refreshed and eager to post. I have set some rules, only post once a week and if I don't post then don't feel bad. Also, I post at www.playawayonline.com. It is our site for our mommy and me classes where I do all our activites. We redesigned it and it has a blog right on it.  I may combine the two sites so I don't feel the pressure to post twice.


How do you feel about technology? Has it caused problems in your life?


Friday, February 8, 2013

Sun Bursts At PlayAway

I don't know about you, but during these winter months I crave sunshine. This past week it has snowed every day, with only a few peaks at the sun. What better time to have my friends make a warm and sunny art project.


Supplies: Black or purple construction paper. Construction paper cut out circles, orange, yellow, and red paint, and plastic wrap.


Place drops of yellow, orange, and red paint all over the white circle or sun. Place plastic wrap over paint and have child smack the paint. The kids love this!

This is after it was smacked a bit.


Remove the plastic wrap and dispose of it. Then if you want you can use your finger or show the child how to make rays around the entire sun as I have done below.


What do you think? Simple and fun. It was my kind of project.


Here are some other great sun projects:


My Buddies and I created suns.

Sandpaper sun by No Time For Flashcards.


Wednesday, February 6, 2013

Blast Off With PlayAway

Today is a quick post. I have been super busy with class, my son's preschool, and the PTA. I tend to over extend myself at times. Hence, the quick post.

This week at PlayAway we focused on the moon and outer space. It was a simple craft and all my friends had fun.


Supplies: rocket ship cutouts, cut outs of squares and circles, black construction paper, star stamps, and white paint.


I made this art project work for my 1-2 and 2-3 year olds. My 1-2's stamped stars on their paper where I had already glued a rocket.  My 2-3's glued the rocket on, made windows out of shapes, and stamped stars.

We played in our magical purple sand and read Good Night Moon. I also did a fun color identifying game on the felt board. I had rockets in all different colors and had my friends help me identify which color was which.

Here are some other great moon activities:

KC Edventures gives you some great moon books.

Inspiration Laboratories  has an Eric Carle inspired activity.

Head on over to Twodaloo for these great Good Night Moon activities.


Thursday, January 24, 2013

Starry Night at PlayAway

Happy Hooligans inspired our star theme at PlayAway this week. I loved her activity so much, I thought why not try our hand at Van Gogh's The Starry Night.


Supplies: Cardboard (I used cereal boxes) wrapped with tin foil, washable paint, cotton balls and/or paint brushes, and star cutouts (optional).


I made this a two step process. We will paint one day, let it dry, and then glue our stars on the next day. Today we painted. I placed drops of blue and black paint on the cardboard that is covered with tin foil and had my friends paint with cotton balls.


Then I added drops of white and yellow. At this point many of my friends decided they did not like to get messy, therefore switching to paintbrushes. The paintbrushes gave more of the Starry Night feel to the painting.


After they dried we glued on our stars.


Our sensory bin was full of our magical purple sand and stars. I had three star cookie cutters and a handful of foam stars that we use in lacing. Caution the foam stars are very small. Always have an adult supervising small children or they can choke. We counted our stars, and we compared sizes of stars. My friends loved this one so much they spent 10-15 minutes at our sensory table.


We supplemented our theme with a few great books:


Twinkle, Twinkle, Little Star by Jane Cabera is a fun twist on the original song. I did sing the entire book and it seem to do the trick. All my friends sat for the entire book; no small job for 1-2 year olds.

I will post our complete project when we finish next week. 

Here are some other great star activities by great kid bloggers:


The Imagination Tree: Van Gogh Finger Painting

Happy Whimsical Hearts: Magical Starry Night 


Sunday, December 9, 2012

Glitter Stockings

We have been making a lot of ornaments these past few weeks. This glitter stocking is simple, cute and almost mess free. Insert squeals of joy here.

Supplies: glitter, plastic storage bags, double sided tape, and thick paper to make a stocking. Our stockings were pre-made and purchased at Michael's.


First place the double sided tape on your stocking. Do only as many pieces as you want of that color of glitter. Don't do what I did the first time and load up the stocking with tape. It was still cute, but only one color. 


Next place the stocking in a plastic storage bag. Make sure the seal is closed tightly or glitter will be every where. Now tell your child to shake it like crazy!


Repeat the process and change colors of glitter. 


It is that simple. You would think I would have a finished product picture. Nope. I forgot to take one because we were having so much fun with other stuff. 

Next time I would bring along glue dots to make different dots all over rather than just stripes. 

Have you made a glitter ornament?

Monday, November 12, 2012

Trucks!

I love Trucks for a class theme. It is simple, very engaging, and it keeps my friends attention for such a long time.


Supplies: Finger Paint (mine was homemade), trucks, and thick paper.

Sorry about how dark it is, it was a phone photo.


Put a few spoonfuls of finer paint onto the paper. Give your child a truck and tell them it is okay to paint with it. Trust me, they will want permission. This art activity was purely for the sensory aspect. Depending on the paint you use, you may or may not want to keep it.


Some friends painted for a minute or two, others painted for twenty. I am not kidding either, one of my friends sat at the table for twenty minutes while the rest of us moved on.


I then had my friends take their truck to the car wash; a simple dish pan filled with water and a few drops of Ivory soap. This activity was just as much fun as painting with the trucks. Warning, you will need smocks and a lot of towels.

We finished off our theme with a Truck Goes Rattley Bumpba by Jonathon London and free play with play trucks. Class was a huge hit.

Have you painted with trucks before?

Thursday, November 8, 2012

It Is Giveaway Time!

The folks over at Melissa and Doug are having their Terrific Twenty List and Giveaway over on their Facebook Page. They are graciously giving away items off their Terrific Twenty List to lucky Facebook fans. Hop on over to their page and check it out.

I really enjoy their products and how all you need is your imagination to make them go. We have several at home and in my classroom.


BONUS GIVEAWAY! Melissa and Doug graciously gave me one toy to giveaway to one of my readers. This is a Rafflecopter giveaway


Do you love this Wildlife Rescue Sort Truck? It could be yours! Don't forget to share this with all your friends.

Disclaimer: I received a Melissa & Doug toy for review. However, all opinions are mine. I would never recommend a product I did not love. No purchase nessessary. Open to USA residents. Must use Rafflecopter to enter  (leave us a comment on  your favorite Melissa and Doug toy), and winner will be chosen randomly by Rafflecopter. Winner will be notified by email. Giveaway ends 11/16/2012. 

Wednesday, November 7, 2012

Melissa and Doug Terrific Twenty List and Giveaway!

Can you believe it is that time of year already? It is time to start thinking about gift ideas for our little ones. One company I love, Melissa & Doug have done it again. I am happy to announce that Melissa and Doug are having a “20 Days of Terrific Twenty” Giveaway" on their Facebook page! Every day (starting November 6) they will be giving away one item from from their Terrific Twenty list to at least one of their lucky Facebook fans! 


To enter go to the Melissa & Doug Facebook page and become a fan. It is that simple. Last year they did a similar giveaway and I personally know a few families that won a Trunki! It was super exciting to watch online and see what they were giving away. I personally like the Suspend Family Game. I know my oldest will really love it. For my little guy I like the WildLife Rescue Sort Set. 

I am really excited to announce that I will be giving one lucky winner an item off the Melissa & Doug Terrific Twenty List! Check back soon for all the details. 

Are you as excited as me?

Monday, November 5, 2012

Open Ended Play; A Must!

In this technological day and age (Pinterest, FaceBook, blogs) it is easy to feel that you have to fill your childs day with amazing art activities and crafts. It is easy to feel like a big failure if you don't. The truth is many of these great activities only take a few minutes. I would say one out of ten activities elicits a response so grand that the kids play for 10-15 minutes. It is just how children are wired; short attention spans.

It is very important for us as parents/caregivers to allow our children to have an opportunity to free play; engage themselves in an activity that we have not planned out. Open ended play. It is a term thrown around and I have found many parents do not know what it means. To me it means setting out various items so my boys can create whatever their heart and mind desires with little to no guidance from me.

Think markers, paint and paper. Boxes. Dress up clothes. Items that can be set out and your child will pick them up and play. Below are some of my favorite open play items:


Play Dough

Blocks, cars and painters tape. Yes, my boys created all this. 


Sand Box

Water Table (with or without sand)

You do not have to have a fancy sensory tub or water table to do these. A simple dish pan works great. Look around your house and see how you can invite your child to play. By the way, The Imagination Tree came up with Invitations to Play. See the link below; I think it is brillant.

Here are some more examples of free/open-ended/invitations to play:


Anna over at The Imagination Tree creates invitations to play for her girls. It is brilliant and simple.

Glittering Muffins discusses why pretend play is important.

No Time For Flashcards says It's Their Job!

Teach Mama discusses Focus on Free Play.

Have you invited your child to play today?

Sunday, October 28, 2012

Monster Snot (Slime)


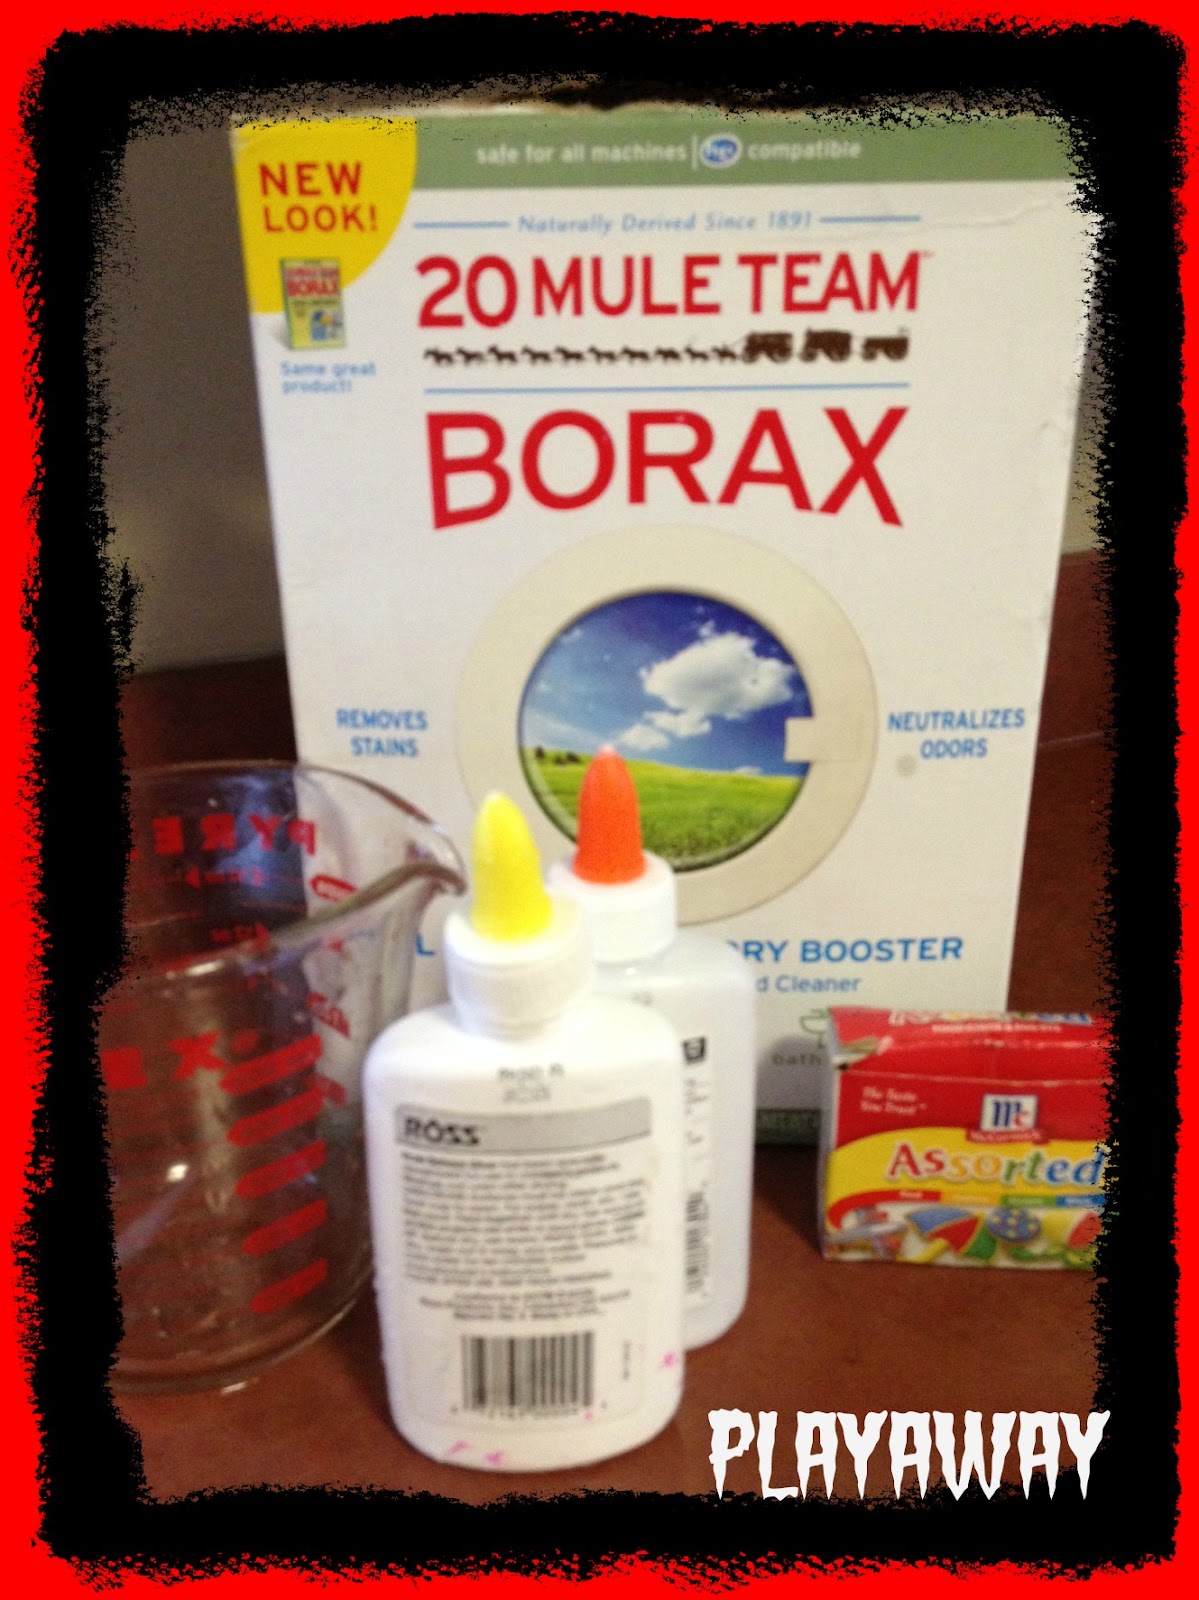
My son has been bugging me to make slime. I keep talking about all the science experiements we are doing in his first grade class Halloween party; it is a mad scientist theme. I have been promising we will test them out prior to class party. Monster snot won hands down. I found this recipe in the book from my local library called Crazy Concoctions by Jordan D. Brown.

Supplies:
  • 1 8oz bottle of white glue
  • food coloring
  • 1 1/2 cups warm water
  • 1 teaspoon of Borax
  • measuring spoons/cups
*Safety note: Borax is safe when used in small amounts. But in large doses it can be dangerous. Make sure to keep the box and this slime away from small children and pets. Always use adult supervision. Clean up any powder spills right away. By all means, DO NOT EAT THIS!


  1. Squeeze the 8 oz bottle of glue into a bowl. I used a disposable pan that I use for our science experiments.  
  2. Fill the empty glue bottle with warm water and put lid back on. Shake, shake and shake. Empty the water into the bowl. Add a few drops of food coloring. 
  3. Fill a measuring cup with 1/2 cup of warm water and add 1 teaspoon of Borax. Mix.
  4. Slowly pour the Borax mixture into the water/glue. Squish it together with your hands. The magic will begin. 

There may be a little bit of water left in the bowl, don't worry the more you play with the mixture the more it becomes a solid. Our water was completely absorbed in a few minutes. 

My boys played with it for about 15 minutes. I then put it in a Ziplock bag to preserve. This is going to be a blast at our class party!


Have you made snot/slime before?

Monday, October 22, 2012

Pudding Paint Pumpkins


Today I wanted to paint with something my toddler friends could paint with without worry, as a few of them put all the paints in their mouths. Pudding paint is the answer.


Supplies: Vanilla pudding, food coloring, paper plates, and paint brushes.


I chose the pre-made pudding option since I keep it in my classroom. You may want to make your own pudding. You will also need food coloring. I used 2 drops of red and 3 drops of yellow.

Our theme today was Halloween/Pumpkins. We read a great lift the flap book called Eek-A-Boo. It is simple enough to keep their attention, yet interactive.


I had my friends paint a paper plate pumpkin. Next week we will add the face after the pudding has a chance to dry.

I also did the popular 5 Little Pumpkin Felt Board Story. I found my copy here, at Mommy School by Oopsey Daisy. She has a great H is for Halloween pack.


Have you painting with pudding before?

Thursday, October 11, 2012

Paint With Hay At PlayAway


Today's theme was farm animals. I have done several crafts including muddy pigs. This time I wanted to try something different. Today we painted with hay. Okay, not real hay due to allergies. I used fake hay. I have no idea what it is made from, but I got it at the local craft store. I got the idea from the great MaryAnn Kohl.

Supplies: hay (or fake hay), washable paint that you will water down, and thick paper. 


First make a paint brush out of hay. I grabbed a handful and then taped it together. You can have the children grab it with their hands or you can have them hold it with a clothes pin. 

I drew a barn on some thick red construction paper. I asked my friends to paint the hay around the barn. I love that they asked for more than just yellow. My mind made the hay  yellow, they knew better. Hay can be any color. 

We finished off with Old MacDonald felt story/song, and two great books. 


Have you painted with hay before?

Wednesday, October 10, 2012

Textured Pumpkin Art


This weekend my son and I were watching Artzooka, a CBC show. It is a great art show for older kids which shows kids how to make art out of recycled materials. We have been watching it since he was four and he loves it. Much of the art projects are for older kids, but some we can do. This textured pumpkin is an example of one.

Supplies: old crayons, school glue, thick paper with pumpkin drawn on it, grater to grate crayons, and art sticks.


Grate the old crayons (get help from your parents on this one kids). My three year old did this under my supervision. He had no problem and there were no boo boos. You know your child and their ability. Closely supervise or do this for them.

I used orange and black crayons. Mix your crayon shavings into a bowl of glue.


Take your art stick and gently rub the glue/crayon shaving mixture onto your paper. It will be thick and a little hard to move for little ones. My six year old had no problem.


Let it dry. It may take a couple days depending on the thickness. *It took at least 24 hours to dry, but the texture is really cool for the kids to feel.

Have you used crayons in a fun way?


Wednesday, October 3, 2012

Shapes

Today was all about shapes. Circles, squares, triangles; oh my! We read Little Rabbits book on shapes.

Our art project was circle painting. My friends and I painted circles (really stamped) with paper tubes.


Supplies: You will need paper tubes (tp or pt tubes), paint, and paper.


Have child put tube into paint and stamp circles.You can also make the tubes into other shapes, although mine did not turn out well.


Our sensory was foam shapes in water. My friends splashed a lot today.


We also found shapes in our classroom and sorted them by shape. I put tape down on the floor in the shape of a square, triangle and circle. My friends sorted them into the shapes on the floor.


Here are some great links to other shape activities!

Teach Preschool and Hands On: As We Grow both had this fun shape sorting/exploring activity. I put mind on our sensory table since it is low enough for my friends to reach comfortably.

Crayon Frekcles has this great pattern with shape activity.

TinkerLab has Circular Patterns.

A favorite food of mine - Twizzlers - over at Pink and Green Mama.

Glittering Muffins has shape sorting.

These are just a few ideas. What have you done?


Tuesday, October 2, 2012

Fall

I love Fall. Cooler temperatures, leaves cracking under your feet, apples/cider/doughnuts, and of course the beautiful colors. There are so many great ideas out there for fall art activities. I kept it simple; egg carton leaf stamping.


Supplies: You will need paper, fall colored washable paint, and an egg carton. Cut the egg carton to where you have 4 spots where the eggs would be. The center will become the handle for little hands. It works great.


There are two ways to do this activity. You can trace your childs hand or you can draw a tree trunk. I prefer the hand tracing. Once you trace their hand let them dip the carton into the paint and stamp away.  They love the sound and feel of stamping. My 3 year old could not stop stamping. We stamped several trees.

I apologize for the lack of photos, my friends in class where so entertaining that I forgot to take enough photos!

Here are some other great fall activity ideas from fellow bloggers thanks to Moms to 2 Posh Lil Divas for compiling a great list!

What fall activity did you do this week?